AuraQ has vast experience helping organisations find the gaps that can be filled to enhance their business. This could be to improve efficiency, integrate legacy systems or deliver new portals and strategic applications to create competitive advantage. Contact us to request a free, no obligation Gap Analysis.

Mendix low-code fundamentals – building the pages of your application
Welcome to the next blog in our Mendix Fundamentals series. This is a blog and YouTube series containing explanations and walkthroughs of some of the key concepts used in Mendix, the low-code platform we use for application development. The four-part series covers the essential features required to build an effective application and, in this blog and tutorial (episode 2), we will focus on Pages. Check back to the previous Fundamentals blog to learn more about the domain model.
As we cover each of the four essential topics, we will provide both a written guide (in our blog) and a step-by-step demonstration in our video tutorial (over on our YouTube Channel). Throughout the series, we will take you through building an event planning application for trail walking events where you will be able to follow us building a real-world example of a Mendix application, along the way we will be sharing development best practices and tips as we build the app out.
In the first episode, we created a domain model and some simple pages to lay the foundations for the application. As a continuation, this episode focuses on Pages and how to use Mendix to create an engaging user interface. So, let’s pick up where we left off, follow along by reading the blog and watching the YouTube video for episode 2. For all of the tutorials, we assume some basic Mendix knowledge, to support this there is lots of learning material available on the Mendix Academy where you can access the online learning paths.
Creating a page in Mendix
A page is the basic end-user interface in a Mendix application and used to contain all the visual and functional elements that will be displayed to the users. This includes information, data inputs and navigation buttons, for example. You will typically have Overview pages to display multiple records, and New/Edit pages for managing information within forms. To manage the application settings and user accounts, you will also need admin pages.
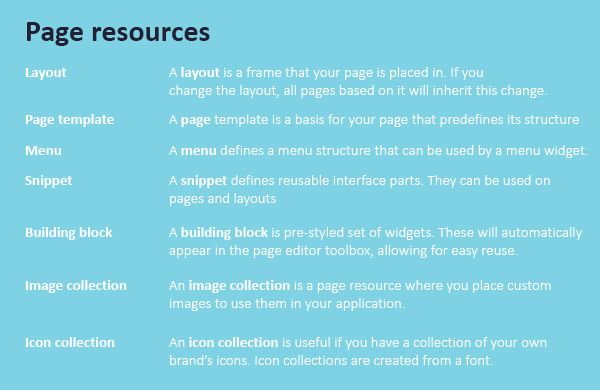
Every page you build in Mendix is based on a page layout and a page template. A layout is a frame you put your page in and specifies what comes where and when. Each page has a layout and this will be the frame that holds the main navigation buttons for the application, the layouts used should remain consistent throughout the app. In addition to a page, you can add page resources in the page editor. This is a configurable element used to help build and structure your page, style the page, and fill it with data.
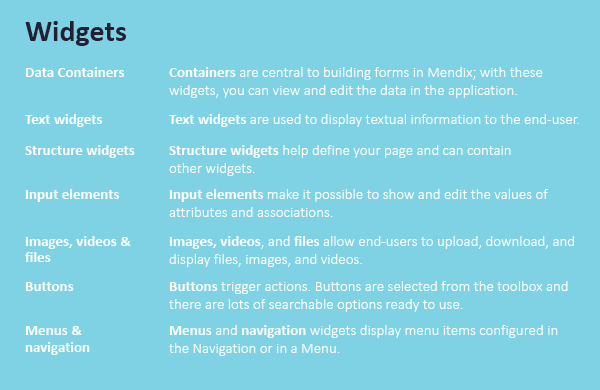
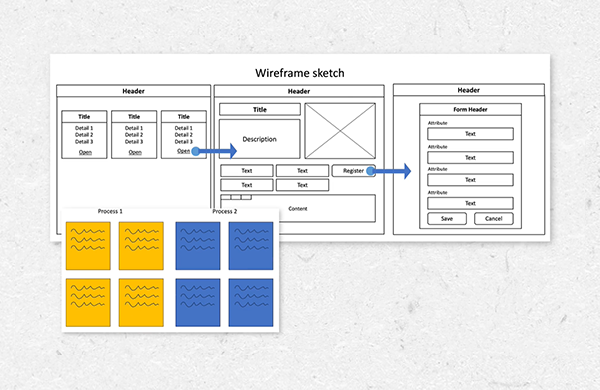
A page template is a basis with predefined elements (widgets). Widgets are the basic elements that build up the features on a page. They can be used on a page to display and format information and allow users to interact with the page. There are a number of widgets that are commonly used shown above (right). For all pages, it’s best practice to have a sketch or a wireframe of your pages before you start developing.
Developing requirements to user stories
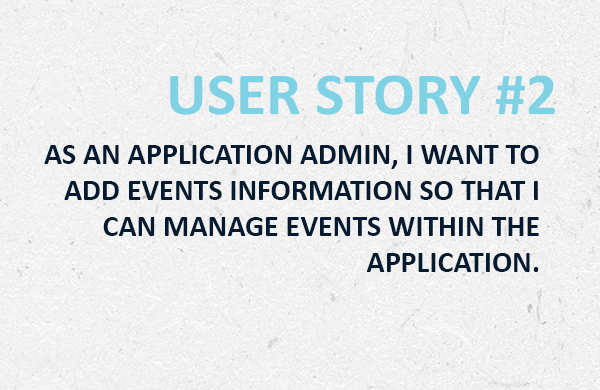
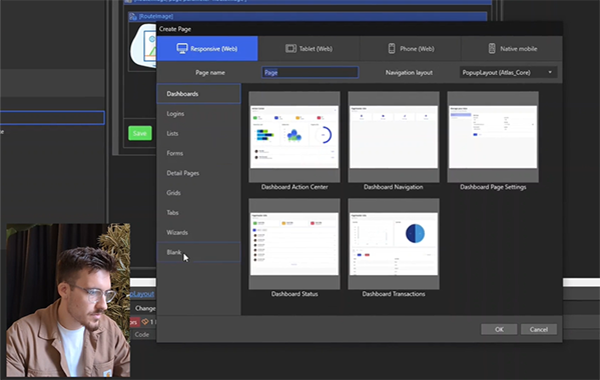
In the last blog we showed how you can quickly create Overview and New/Edit pages from the trail walking application’s domain model. We right-click on the ‘Route’ entity and select ‘Generate overview pages…’, then also select ‘Event’ from the entities list to generate pages for both. Now we are going to develop our pages to requirements which are captured in user stories. User stories are an integral part of the Mendix application development process and are used to manage and describe the features which need to be built within an application. This approach to software development follows the principles of the Agile methodology. For our trial walking application, we will start with two user stories for both of which we need to develop the ‘Route’ and ‘Event’ pages to provide all the features to fulfil the user requirements:
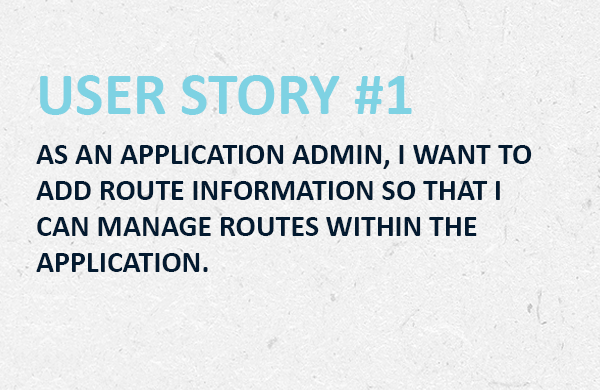
Starting with the first user story, the user story requirement means it’s necessary to do a number of things; we need to create a button to add new routes, a list to view all the existing routes and a button to edit the routes. To achieve this, firstly we will remove everything in the ‘Route overview’ page and start to add some widgets. We can use widgets and building blocks (pre-made bundles of widgets) here to build functional pages.
Using widgets and building blocks to structure your page
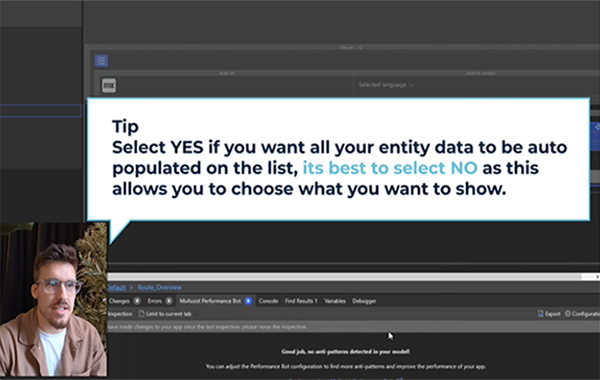
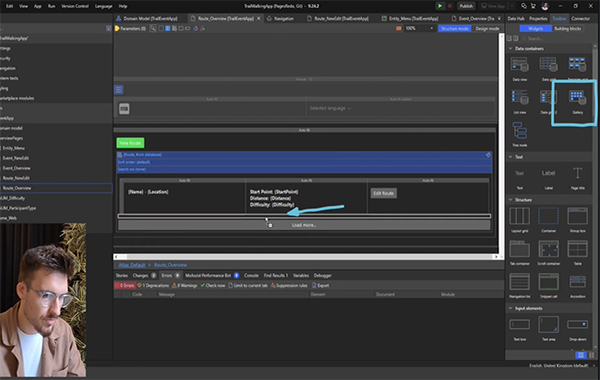
We will add our first layout grid to the page, this is the start of creating our page structure and will help us keep everything in one place. Layout grids are added from the widgets section to the right. To start, we will use the “full” layout option but later on we will add more layout grids where we can add rows and columns to separate content on the page and choose how the information is displayed e.g., whether the column width is fixed or set as auto-fit to adjust to the space available. Within our layout grid, we will now add a list view data container widget to the page. This displays a vertical list of records which you can configure. Open the list view and select ‘Route’ as the data source, this will show all Routes that have been added to the database. (There are several other ways of retrieving and filtering the information depending on the complexity but in our example, we use the database option). It will ask you whether you want to automatically fill the contents of the list view, we will select ‘No’ as we want to choose what information we display.
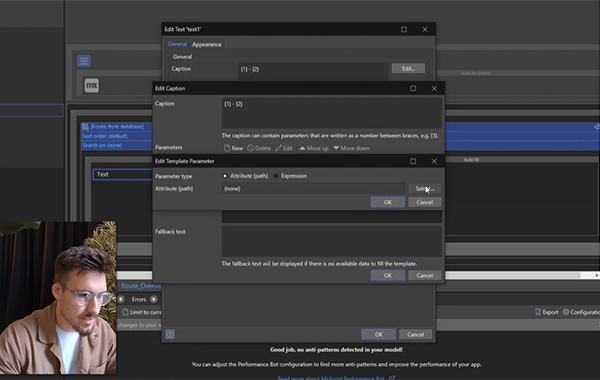
We will add another layout grid here and we can now start defining the attributes to show for each list item (above right image). You can add text to create a label in your list or add a parameter which will link to the record being displayed in the list (more details of adding parameters can be found in the YouTube tutorial). Text styles can be quickly chosen by selecting a render mode option from the drop-down. This helps with the UI and differentiates what text is the most important by drawing the user’s attention through Heading styles. You can also customise the appearance, for example change the colour or alignment.
Adding buttons and basic styling to our page
Our list view is now set up to show all records for the Route entity. Buttons are now needed; one too create a new Route and a separate button that allows users to edit a Route. Buttons are selected from the toolbox, where you choose one of the ready to use options or also select a blank Button. For our first button, drag and drop a Create button into the page above the list view, this will create a new Route record for you. Select ‘Route’ as the Entity, select the Route ‘NewEdit’ page and rename your button to ‘New Route’. Button styling is done using the Mendix default classes: Default, Inverse, Primary, Info, Success, Warning, Danger. They are based on the branding colours set in the SCSS style sheet custom-variables.scss. The colours can be changed to brand your app appropriately and additional classes can be created to improve UI features. (UI will be covered in much more depth in a later series).
For our ‘Edit’ button, add another column to the right of our layout grid and add an ‘open page button’ widget and also link to the ‘Route NewEdit’ page. Change the name of the button to ‘Edit Route’. (This needs to be within list view, so that the Edit button will appear on each route).
We now have a page to view Routes, add new routes or make changes. To access the page, we can add this page to the navigation menu for easier access. Select ‘Navigation’ and ‘New item’ and add the name, map icon, and for the ‘on-click’ box, select show the page and link this to ‘Route overview’. You can save and run locally to run the application on the local drive, giving you a preview of the app. At this point, you could select the Routes page and try adding and editing some Routes.
Using the gallery widget
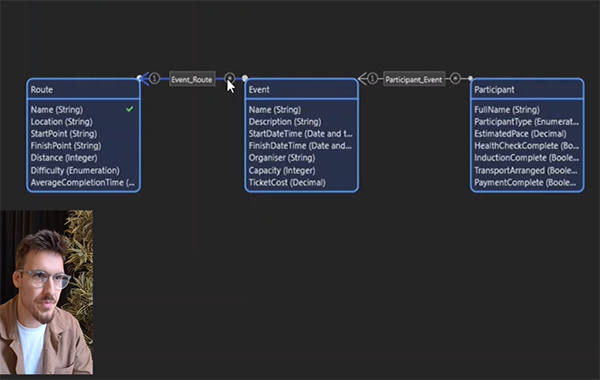
With our basic page structure set up, we need to now add the features that will allow users to create, edit and view ‘Events’ related to the Route. When we created our domain model in episode 1, we implemented a many to one association between the ‘Event’ and ‘Route’ entities (image below left), this means each ‘Event’ will be linked to one ‘Route’. One way to view these would be to add a ‘Gallery’ within the Routes list. That way all events shown will be grouped with the Route.
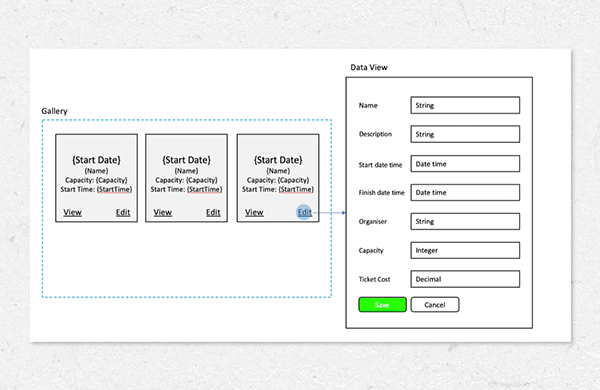
The Gallery widget can be used as a replacement for both the template grid and list view and used to display multiple records horizontally and vertically, giving a card or board view. In our app, we will add a Gallery within the Routes list view. Open the gallery view and for the data source we will choose ‘association’, going from ‘Route’ through to ‘Event’. Again, we will format the view to show the right information, adding a layout grid which includes the name of the Event and Start Time’ we will also add a ‘View Event’ button and an ‘Edit Event’ button. We want to make these buttons stand out so we will use icons here and change the render mode to link. To improve appearance, we can format the buttons using the button ‘Appearance’ tab where we will make: Top Spacing to Outer small, and Align Self to Left. Do the same for the Edit Event button with Align Self set to Right. We will also change the layout grid column size to manual – 4.
To keep our page tidy, we use a container – this is a layout that can be used to group elements and apply common functionality such as visibility settings or formatting and alignment. We add a container by either dragging and dropping it from the elements or by right-clicking on an element and selecting add a container and then move our text inside. You can easily apply colours to a container to give it some contrast on the page and align the text to be centred as a column. All of this can be previewed by selecting Design mode in Studio Pro. We’ll add one final button for creating events and call this ‘New Event’, this button will be inside the route list and outside of the gallery, this is so that we can create an event through the route association. Now that we have our custom page built, we will remove the generated page named ‘Event_Overview’.
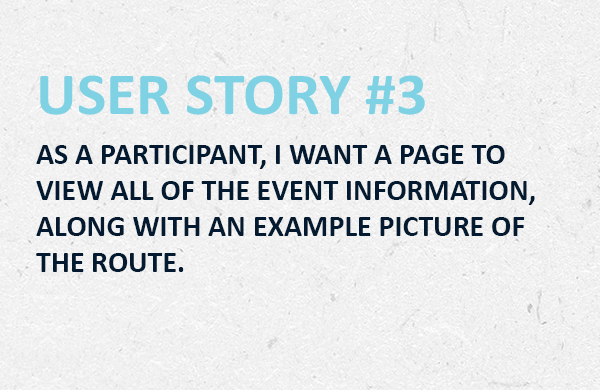
For our next user story, we need to add an event page where we need show all the information associated with the Event, this should include a dynamic picture that shows an image of the related Route for that Event. To achieve this, we will first need to build the functionality to add an image to the Route. Here we will revisit the domain model again and add a new Entity called ‘RouteImage’ and select the generalisation as ‘System.Image’. As mentioned in the domain blog, this allows the new entity we have created to inherit all the attributes and associations from the Parent Entity, giving us a ready-made Image entity to use. Giving it a one-one association with the Route Entity will ensure there is only ever one per Route.
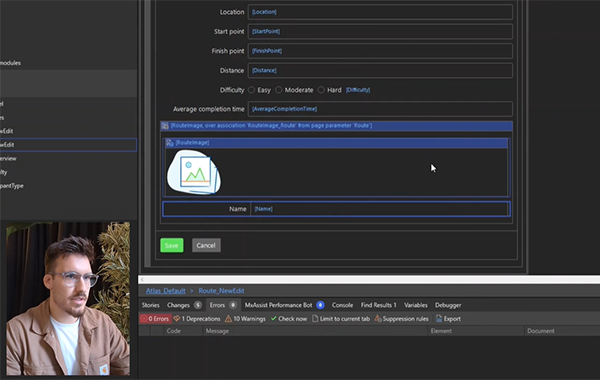
Next go to the Route_NewEdit page and add a data view. For the ‘Data Source’ select Entity and make an association through to ‘RouteImage.’ This is used to show a single record, as opposed to a list view for multiple. Add text in the data view that will show the name of the uploaded image.
At this point, we need to use a ‘Call microflow button’ to add a button for users to upload an image. This can be done by selecting the button from the Toolbox and creating a simple microflow to create the association between the Route Image and the Route. Follow the steps in the accompanying YouTube video to build this and there is more detail on microflows in episode 4 of this blog series. Finally, we need to add a new page that will be used to upload the Image. We will use the ‘Form Horizontal’ page for this and call our page ‘RouteImage_NewEdit’ and add the ‘RouteImage’ as the data source. Once this is complete, navigate to ‘Properties’ and change the layout for the Route NewEdit page to ‘responsive’ as it is best practise to only have one pop-up window stacked on top. This is to improve the user experience and complete the microflow you started previously.
Using a data view to access associations against records
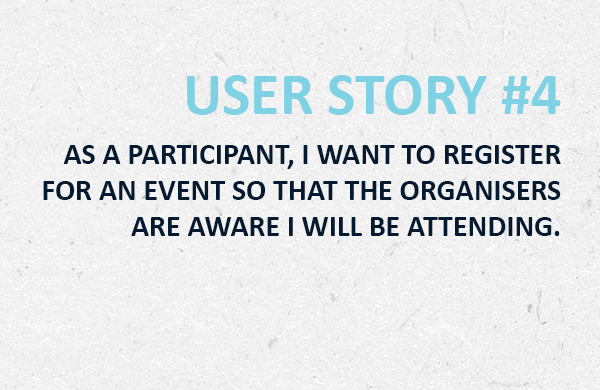
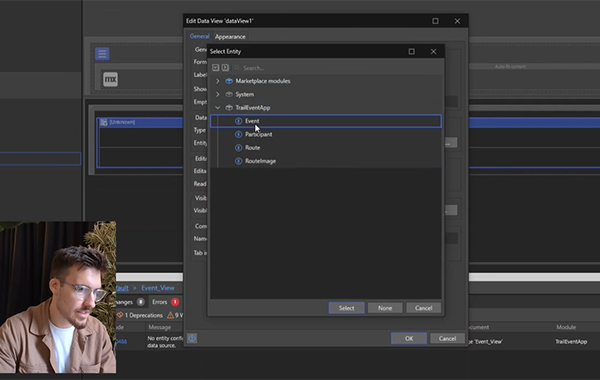
To fulfil our last user story, we need functionality that allows users to view and register for events.This requires another page and for this we would start by selecting a blank page with ‘Atlas_Default Layout’ and name this ‘Event_View’. Add this to the View Event button on the Route Overview page.
Open Event_View. On this page we want to show general event information for the Participant with a register button, a dynamic image showing the route, and more specific event information below. To do this we use a data view, this allows us to access the data or associations that exist for that record, in our case this is the event that we want to view and all of the information related to that event. Drag and drop a data view and select the data source as ‘Context’ and ‘Event’.
Again, it’s important to add structure to the page. To create clear sections, we can use building blocks. Add two cards and in the top card, add a layout grid with two columns and move the text inside. In the bottom card area remove the text, add a layout grid and a tab structure. When there is more information than can fit on the screen, tabs can help create categories to simplify the page. For our app, we create four columns and two rows and copy it into the first tab. Make four tabs with specific names and change the tab style to suit.
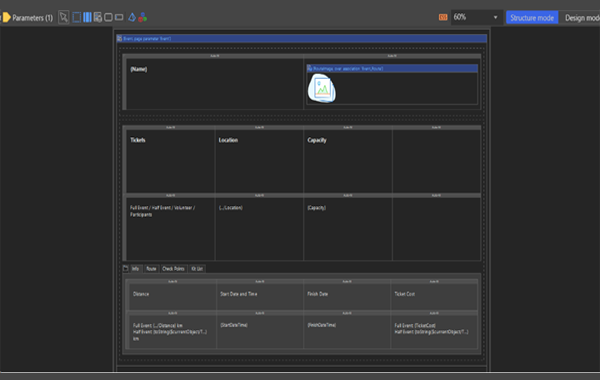
With the structure built, we would now change the top text box to display the event name and change the style to Heading 3 and add a dynamic image to the layout grid. Because we have already built the relationship here, we can select the image associated with Event. Next, we will add all of the static and dynamic text for the Event View page as shown below.
*A note on associations here – Mendix allows you to easily find information related through an association. A good example is displaying the Route location, within the Event data view. When selecting the attribute in the parameter, you can follow the Event_Route association, where you can select the Route and Location related to that event. Similarly for the Distance, and we have simplified this app to have full tickets and half tickets. This can be easily calculated in the expression editor as shown for distance and price. See the video for the full walk through of this page set-up and finish of the rest of the page to match the image below (left).
The participants still do not have a way to select an Event so next we will make the Event_Overview where all live Events will be shown. This will be a simple Gallery view with text and a view button. To make it easily available we will make this the default homepage for all users.
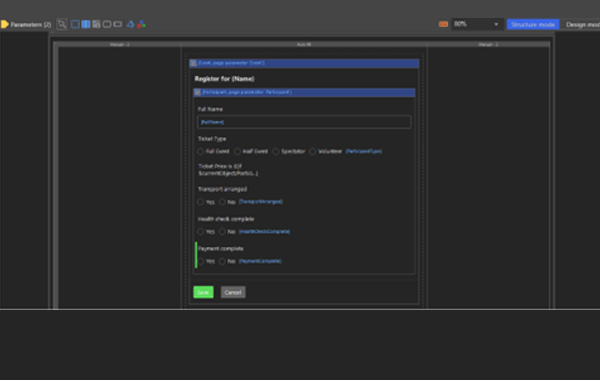
The final feature is to build a form to enable functionality that permits Participants to register for an Event. For this, we will add a new page and call it Event_Register and add a card and a data view for the Event. This time we want to add a data view within Event for a Participant. Again, this will link the new participant to the chosen event. With a data view we can add input elements to create the form. In the details of our user story, it’s documented that participants have to have completed a health check before a payment so here we add some simple validation using conditional visibility. Again, see the video for a full step-by-step guide but it’s worth noting here the use of Conditional visibility controls whether a widget is shown or not depending on other values or logical expressions. By adding this to the payment complete field, we can select based on attribute value where the HealthCheckComplete is true. This feature is indicated by the green tag. It should be noted that validation is typically done using microflows and this will be shown more in a later blog but for now, return to the Event_View page and configure the ‘Registration’ button to create a new Participant object through the Event association and open the newly created page. Now you can run and review your app.
Running your Mendix app
Now that you have completed all of the basic pages, you can click run locally on the top bar of Studio Pro.
And that’s all for the basics of building pages! We now have a user-friendly interface built following user stories. Admins can create Routes and Events, and Participants have the ability to register. In our next blog/video (episode 3), we will be going over the topic of Security where we will demonstrate how to set up the security to control the access to the application and control the permissions for each user. Finally, we hope you found this blog helpful, if you have any comments or questions, please do not hesitate to get in touch and don’t forget to check out the full tutorial video on YouTube!
Related Blogs


Drag