AuraQ has vast experience helping organisations find the gaps that can be filled to enhance their business. This could be to improve efficiency, integrate legacy systems or deliver new portals and strategic applications to create competitive advantage. Contact us to request a free, no obligation Gap Analysis.

Learning to style it out with Mendix
In this introduction on how to apply custom styles to your Mendix app, I’ll walk through the basics of how to add custom styles to elements in the Mendix Modeler, applying classes and then bringing it all together in the use of SASS to enhance your Mendix app.
What do I need?
– Installation of a SASS Complier: Scout(http://scout-app.io) or Koala (http://koala-app.com/)
– A text editor of your choice: http://brackets.io/
– The latest Mendix Modeler (for this demo ill be using 7.6.0)
Create a new App
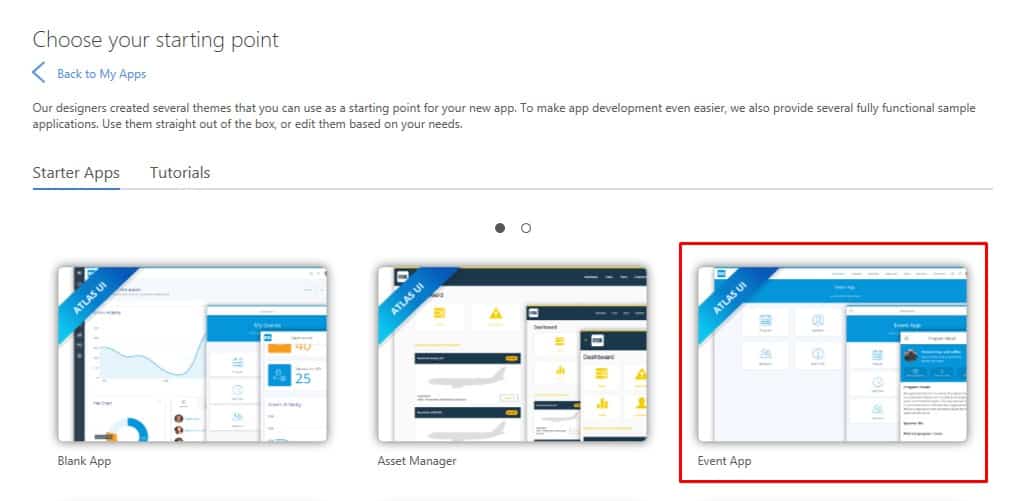
– Open the Mendix Modeler / Create a new App / Select a Starter App.

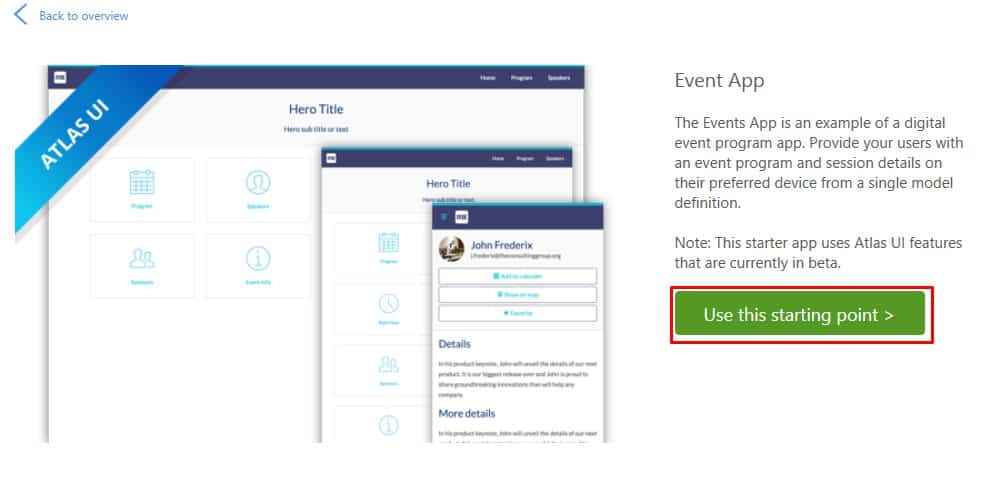
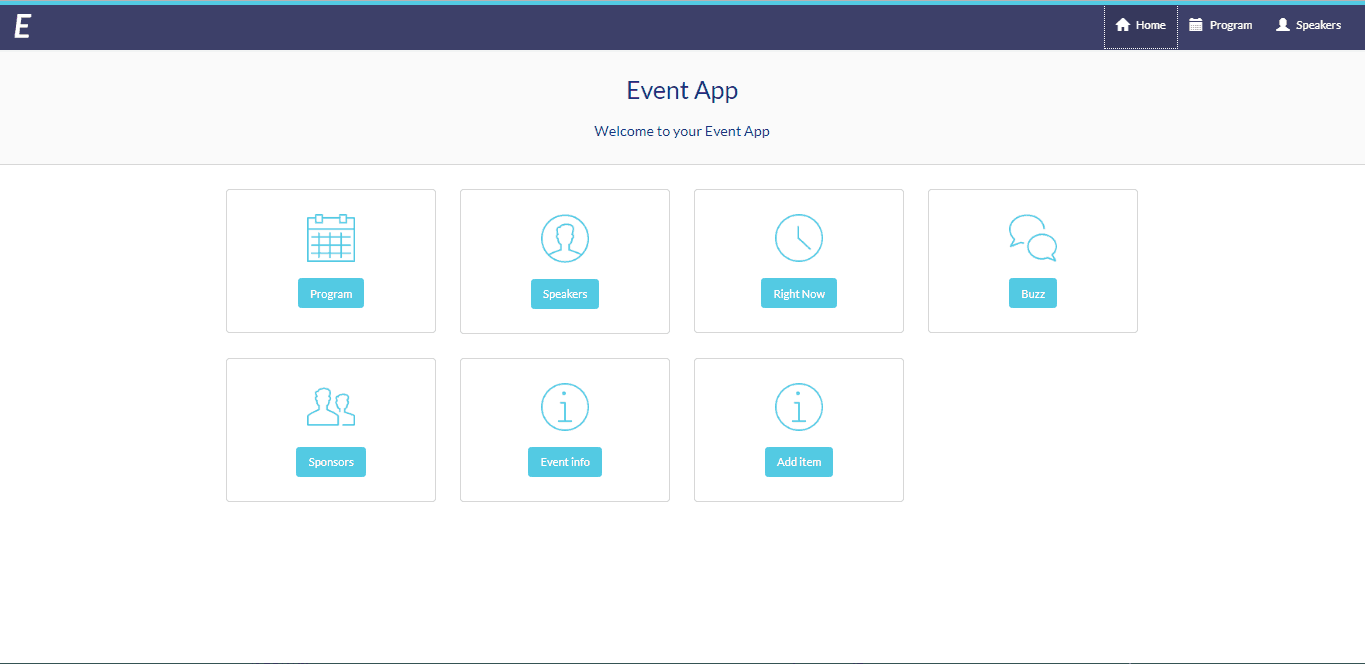
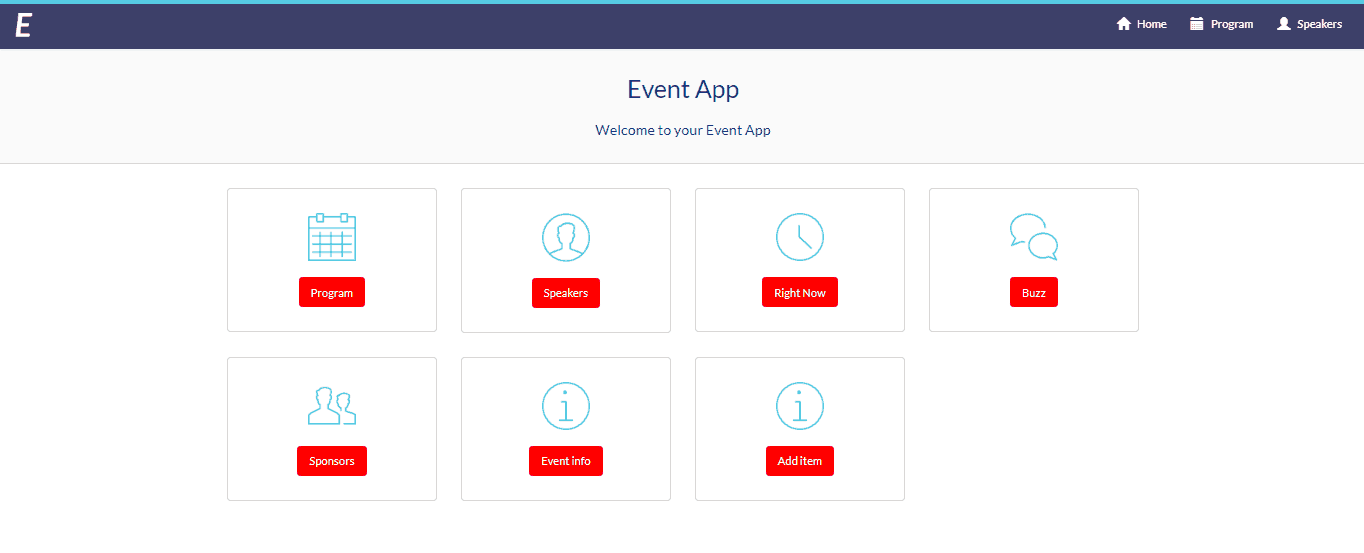
– Run and view the app, it should look something like this:
Setting up Koala
Before we go any further with the app we should set up our SASS complier:
– Open Koala and select “Add Folder”
– Browse to your app and select the “Styles” folder:
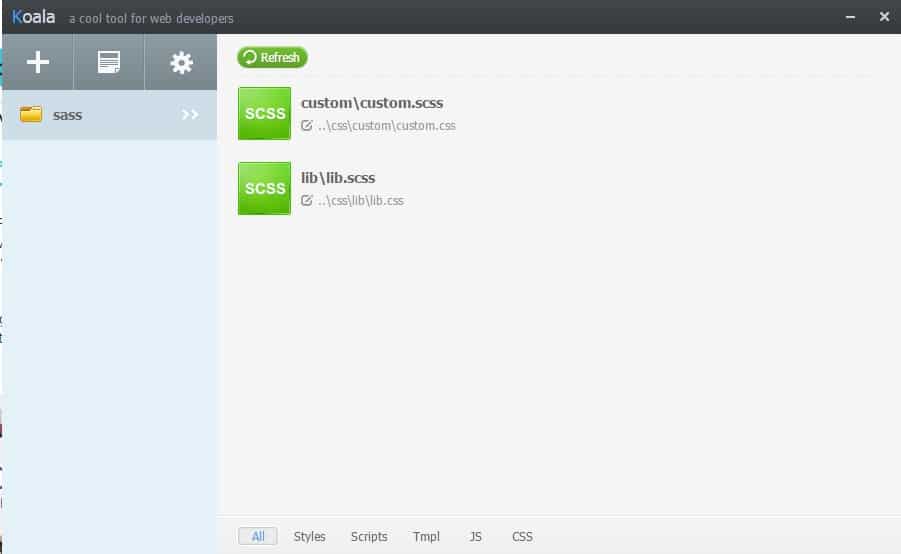
Now when you make changes to the SASS file, Koala will automatically compile the SASS into CSS.
For more information on the setup, here are some useful guides:
https://docs.mendix.com/howto50/setup-mendix-ui-framework-with-koala
https://docs.mendix.com/howto50/setup-mendix-ui-framework#3-configure-scout
Inline editing in the Mendix modeler
One way we could add custom styles to a Mendix app is through inline editing. With inline editing you apply styles directly on the element in the Mendix Modeler to overwrite the default styling.
To update one of the buttons on the dashboard to red, select a button and in the “Properties” tab expand the “Style” window and add the following CSS: background:red; Background-color:red;
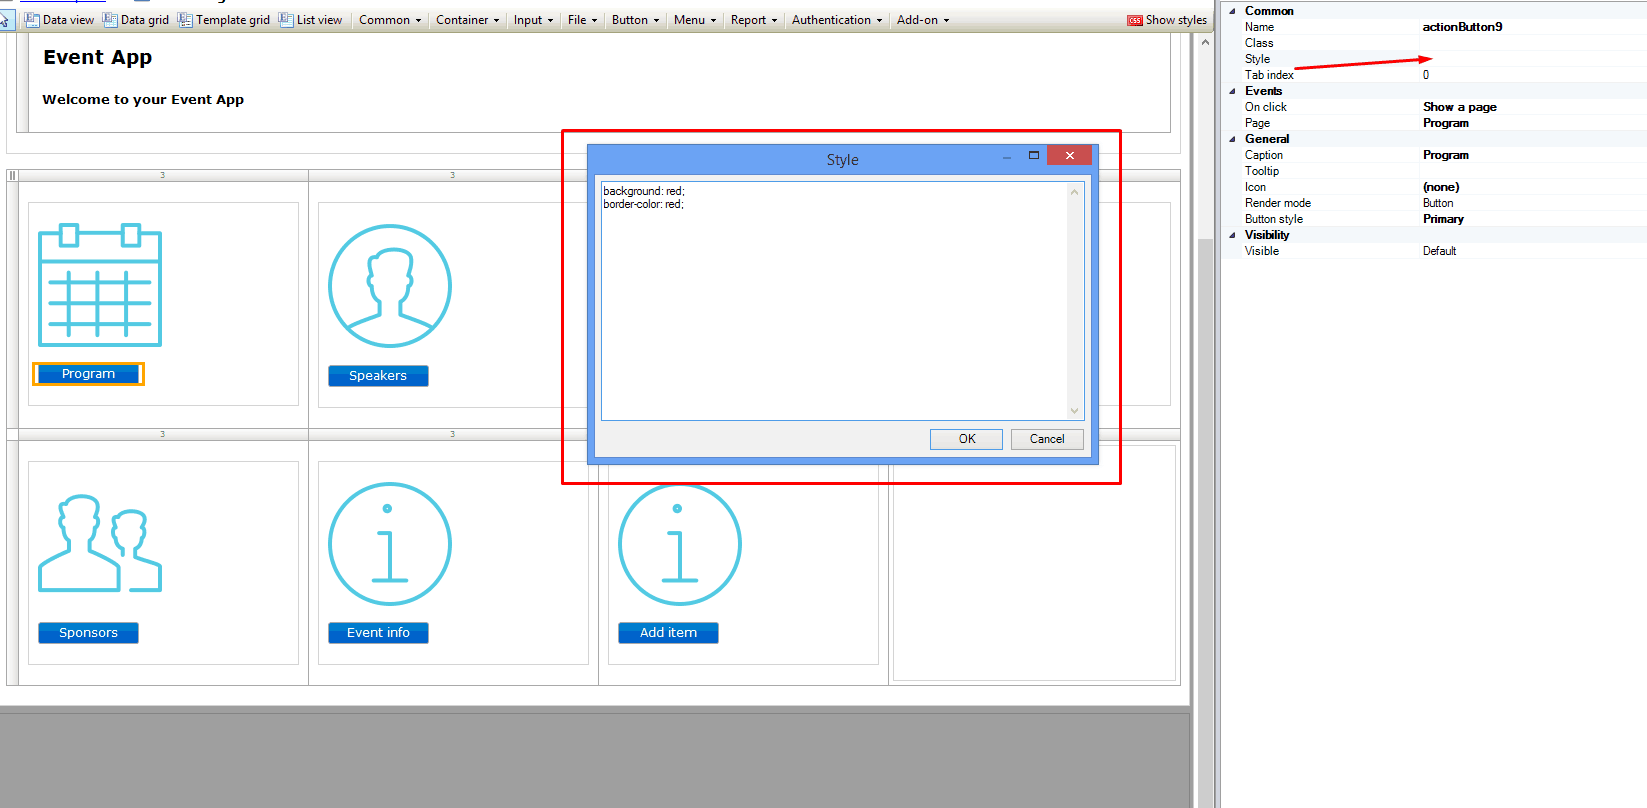
That would give the desired effect of a red button. However, if you wanted to change the style of every button on the dashboard to red, you would have to apply this style to every button on the page. This is time consuming, especially if/when the colour needs to be changed at a later point in the project.
Creating a class
We could, however, create a class in the CSS and apply this in the Mendix Modeler. A class will contain the above styling which can then be applied to every button. This means that only the class needs to be changed and then all the buttons with that class with also be updated.
1. Open brackets
2. File>Open Folder
3. Choose the “styles” folder of the project app

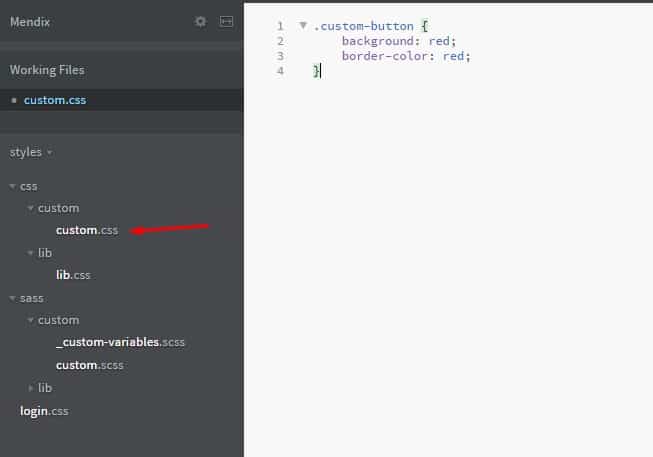
In Brackets open the custom.css file, create a new class called custom-button and apply the styling from before:
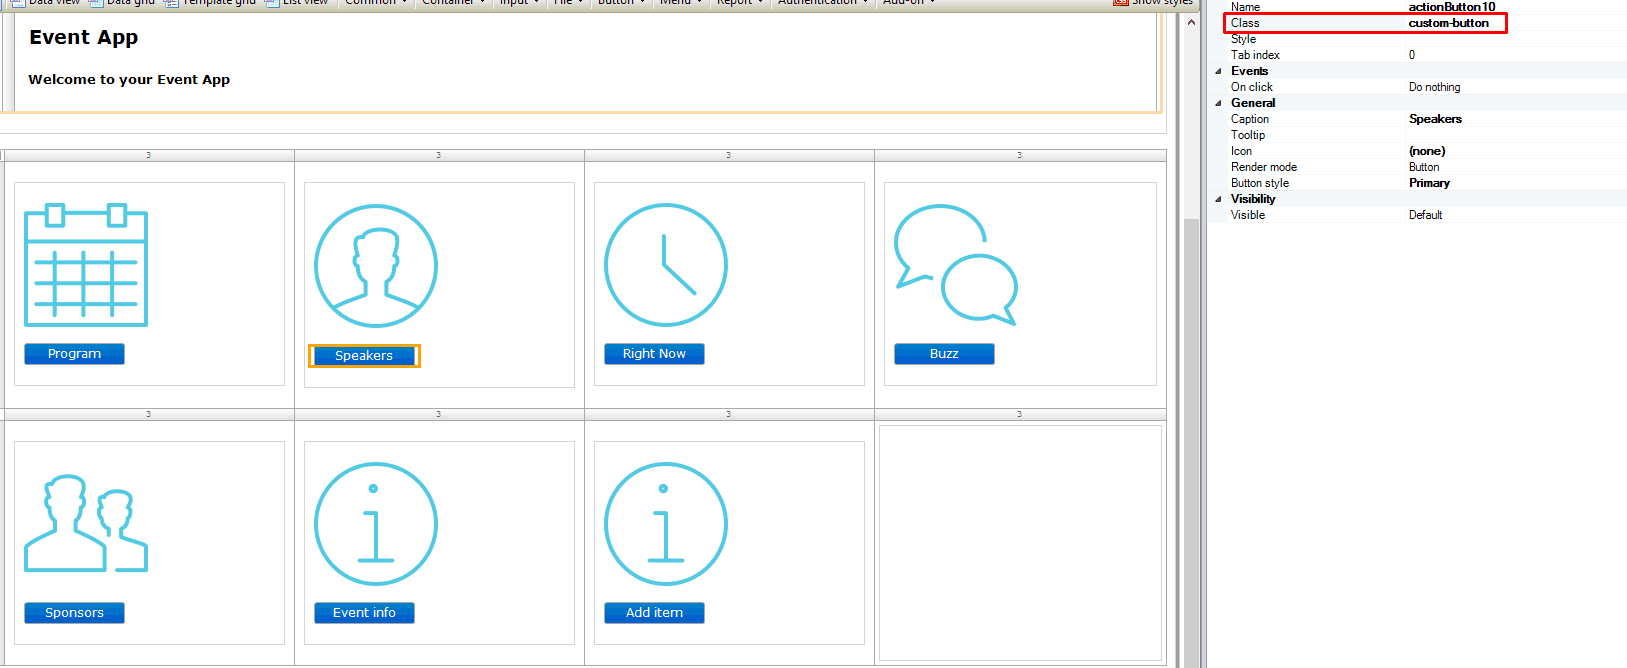
Now add that class to all the buttons on the page:
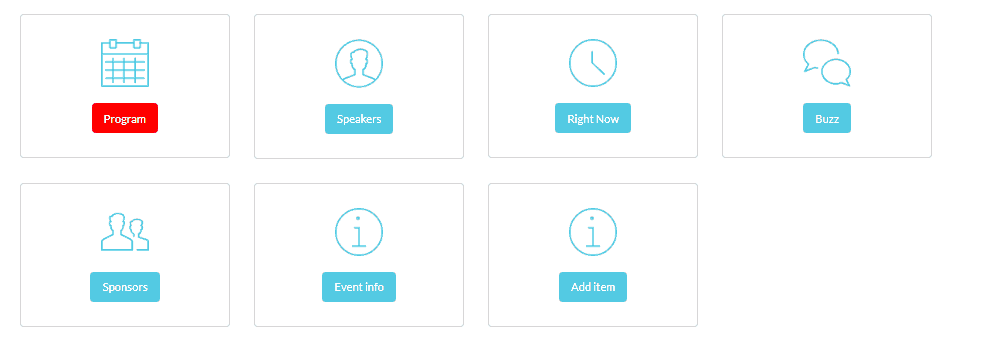
Save the file in Brackets, run your Mendix Modeler and it should look like this:
Adding classes like this is very useful, as you don’t have to add the same style to every button. This means you can change the colour of these buttons easily without having to edit each style, just by amending the class.
However, what if you wanted to change ALL the buttons on your app to this style? It would be exceptionally time consuming to apply this class to every button and you will have to remember to apply the class to every new button you create. What if you had a specific brand colour you wanted to apply? Wouldn’t it be easier to have that in one place, and not have to update every class with this colour?
This is where SASS comes in!
Modyfing SASS
SASS (Syntactically Awesome Style Sheets) is, according to their website (http://sass-lang.com/), “An extension of CSS that adds power and elegance to the basic language. It allows you to use variables, nested rules, mixins, inline imports, and more, all with a fully CSS-compatible syntax.”
Open the _custom-variables.scss file in Brackets (sass/custom/_custom-variables.scss) which should look something like this:
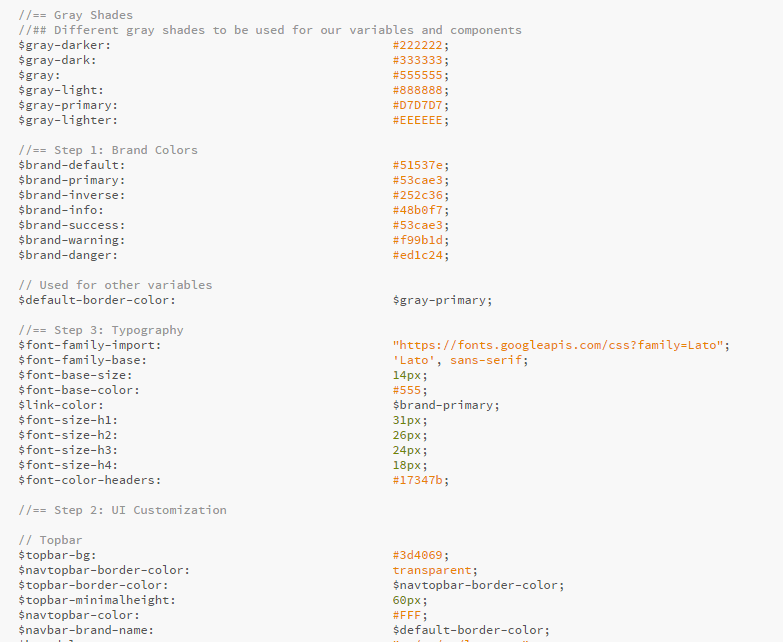
This file holds all the custom variables of your theme. In here you can edit the brand colours, font size and logo size all from one place. This is very useful when you need to make quick theme changes to your project.
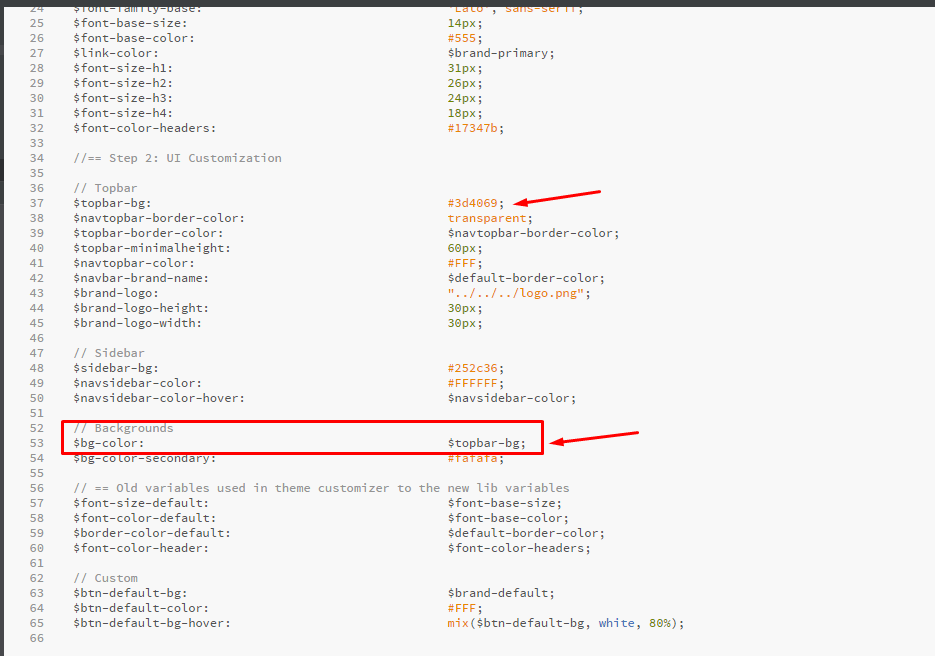
We can now edit any of these variables, for example the background colour of your app. Change the value of “$bg-color” to “$topbar-bg”, this will change the background colour to be the same as the topbar background colour:
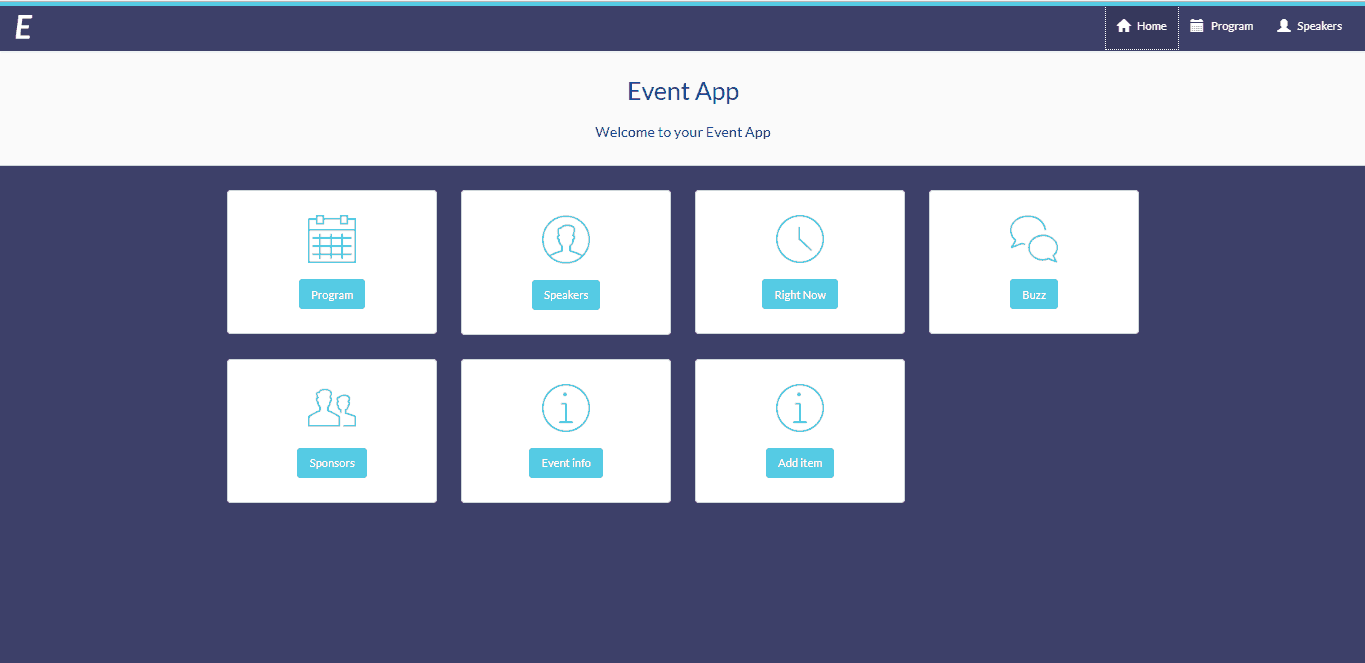
Once you have made those changes, save the file and re-run the Mendix Modeler and your results should look like the following:
If you investigate the lib folder of the sass, you will see that it contains folders and files for all of the styling in your theme:
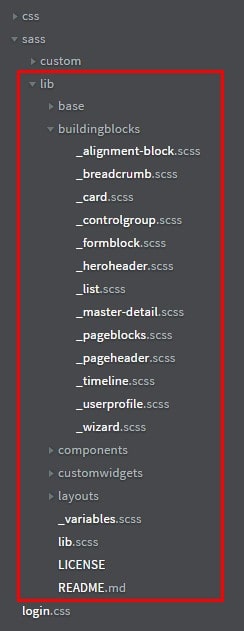
Open ‘_buttons.scss’ in sass/lib/components/_buttons.scss and you will see it looks very similar to regular CSS, but it is using the variables from the ‘_custom-variables.scss’ file (sass/custom/custom-variables.scss). The styling in these files is the default styling and if you want to make changes to the SASS then this should be done in the custom folder of the SASS.
We are now going to update the colour of all the primary buttons across the app using SASS.
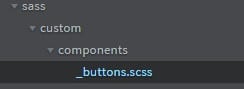
Create a new file called “_buttons.scss” in the custom sass in a new folder “components” and update the custom.scss file to import that file:
![]()
When you create custom files it must adhere to the same folder path as the lib file so it can be imported.
**Tip** If you have created a new theme from the theme creator this will be done for you (https://ux.mendix.com/)
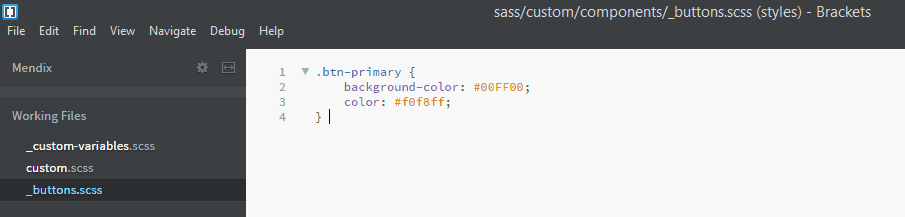
Add the following code to overwrite the primary button colours:
**Reminder** If you haven’t already, remove the class’s applied earlier to the buttons in the Modeler. Save the files and run the app in the Mendix Modeler.

That’s fine, but we are still hard-coding the values. We can create new variables in the custom-variables.scss that will hold these values so they can be easily changed.
In the custom-variables file add two new variables and give them a value:
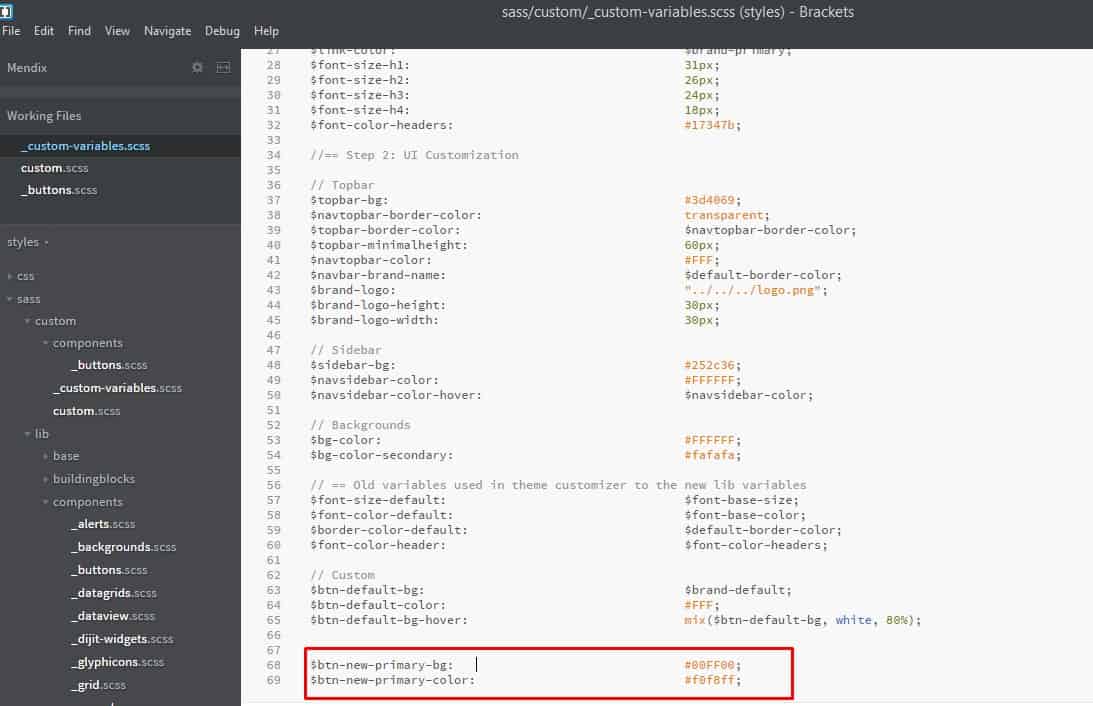
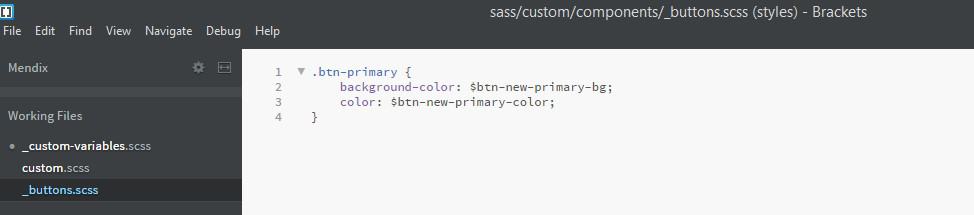
Then update the _buttons.scss to use those variables:
Now when you run the application it should be exactly the same, but instead the button.scss is using the variables from the custom-variables.scss file rather than the directly in each file.
Related Blogs


Drag