
Mendix UI Hack: Fix File Upload Validation in Five Easy Steps!


You know how it goes; it is a story as old as time itself. You design the most beautiful Mendix app, with an amazing dashboard, with lovely form pages, and the UI is on brand. The customer is calling you a UX genesis.
Take this page for example. The page looks clean, and even the validation messages are looking sharp. That is until, a new requirement comes in, the customer wants to be able to upload a file. Not a problem – you think! You create the new entity, add the new file uploader to your page, update the validation and save microflows on and think nothing more of it. But wait, if you leave the file empty it gives you a pop-up validation, not a page validation like every other field on every other page. Now you have two types of validation, pop up and inline!
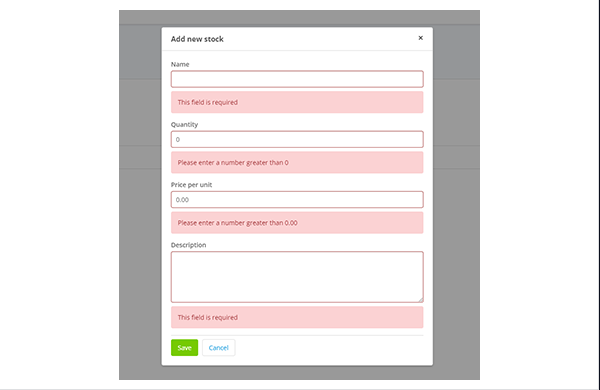
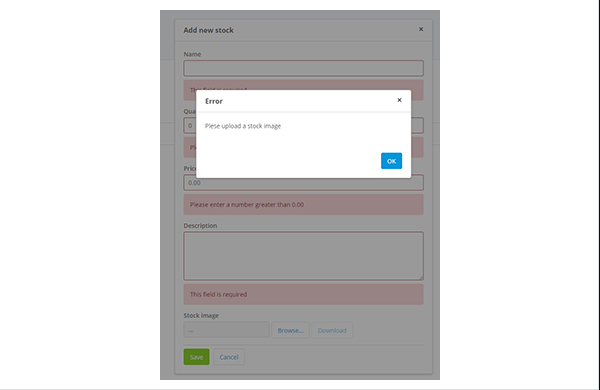
But your validation microflow makes sense, right? If the file is empty, show validation message on the file? Unfortunately, this doesn’t work, no matter how hard you shout at your microflow. There is, however, an easy way to sort this out and get your page back to its former glory.

Step 1: On your page, add the ‘Has Contents’ attribute underneath the file uploader, making sure you set ‘Show label’ to false:
Step 2: Update the validation microflow to show validation feedback against the ‘HasContents’ attribute. What this will do is give your microflow an attribute to set the validation message against. The reason we get a pop up is because we cannot select the actual file uploader entity to show the validation message against, so adding this attribute solves resolves this.
Step 3: Next, open up your Sass file and add the following in your custom folder (hopefully in an appropriate place which makes sense, and not just the custom.scss file although this is tempting) …
 (For Mendix v7 and earlier)
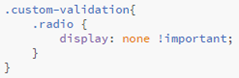 (For Mendix 8)
What we are doing here, is saying anything with the ‘radio-inline’ or ‘radio’ class that is inside our ‘custom-validation’ class will be hidden. As these classes only apply to radio buttons, it will only hide our ‘HasContents’ attribute.
Step 4: Then add a new container around the file uploader and ‘HasContents’ attribute and give it the class name of ‘custom-validation’ (you can change this class name to something more suitable).
Step 5: Finally, compile the sass file and run your Mendix project. Open up your page, don’t fill anything out to trigger your validation errors and it should look something like this:
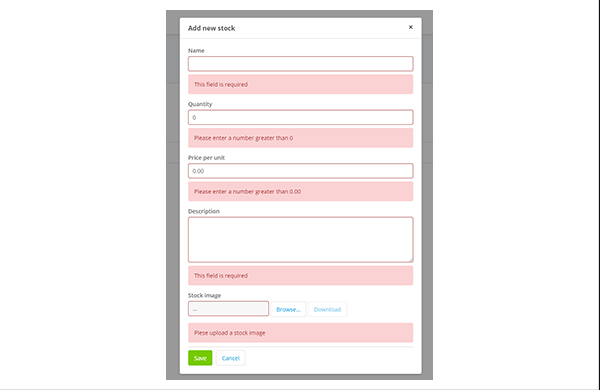
And that’s it! You can get back to designing awesome pages. This method can also be applied to not only file uploaders, but also if you require custom radio buttons:


In this instance, we have built custom buttons that change the state of the radio button. The actual radio buttons are hidden but are still used to display any validation errors and you can finally have full control of styling. The possibilities are endless with this one little hack! Use responsibly….
More from Knowledge Hub
Continue exploring insights and strategies